
Introduction
In this series of email development tutorials, I hope to help you understand and build interactive emails of your own and elevate my own work to new levels. This interactive email tutorial on 'how to build an interactive character builder for email' is part of a larger series of posts looking at the gamification of email using interactive elements. If you'd like to jump ahead to see the final example email (I know you do 😉 ) then you can view the example email here.
Are you back? did you like the email example? Okay, let's get started and look into how I built this email...
The basics of interactive emails
One of the more enjoyable aspects of my work is when a client requests an interactive email build. Interactive emails have become more popular over the last few years thanks to the checkbox hack technique. This technique allows email developers like me to build out fun interactive elements in the emails themselves; boosting engagement significantly and driving better performance. The interactions are often called 'soft-interactions' and help warm the recipient up to the main call-to-action which is usually a harder commitment to make.
When building interactive emails it's important to always consider the 'fallback'. The fallback is how the email will look when the interactive techniques are not supported by the recipients' email client. We use a number of different techniques to ensure that the email displays correctly and the message is still relevant for all recipients. This usually means we have default content which is visible in all cases where interactivity is not supported. Then when interactive is supported (generally iOS devices and a few web-based clients) we hide this default content and turn on the interactive elements. Put simply, it's like two emails in one!
What's the plan?
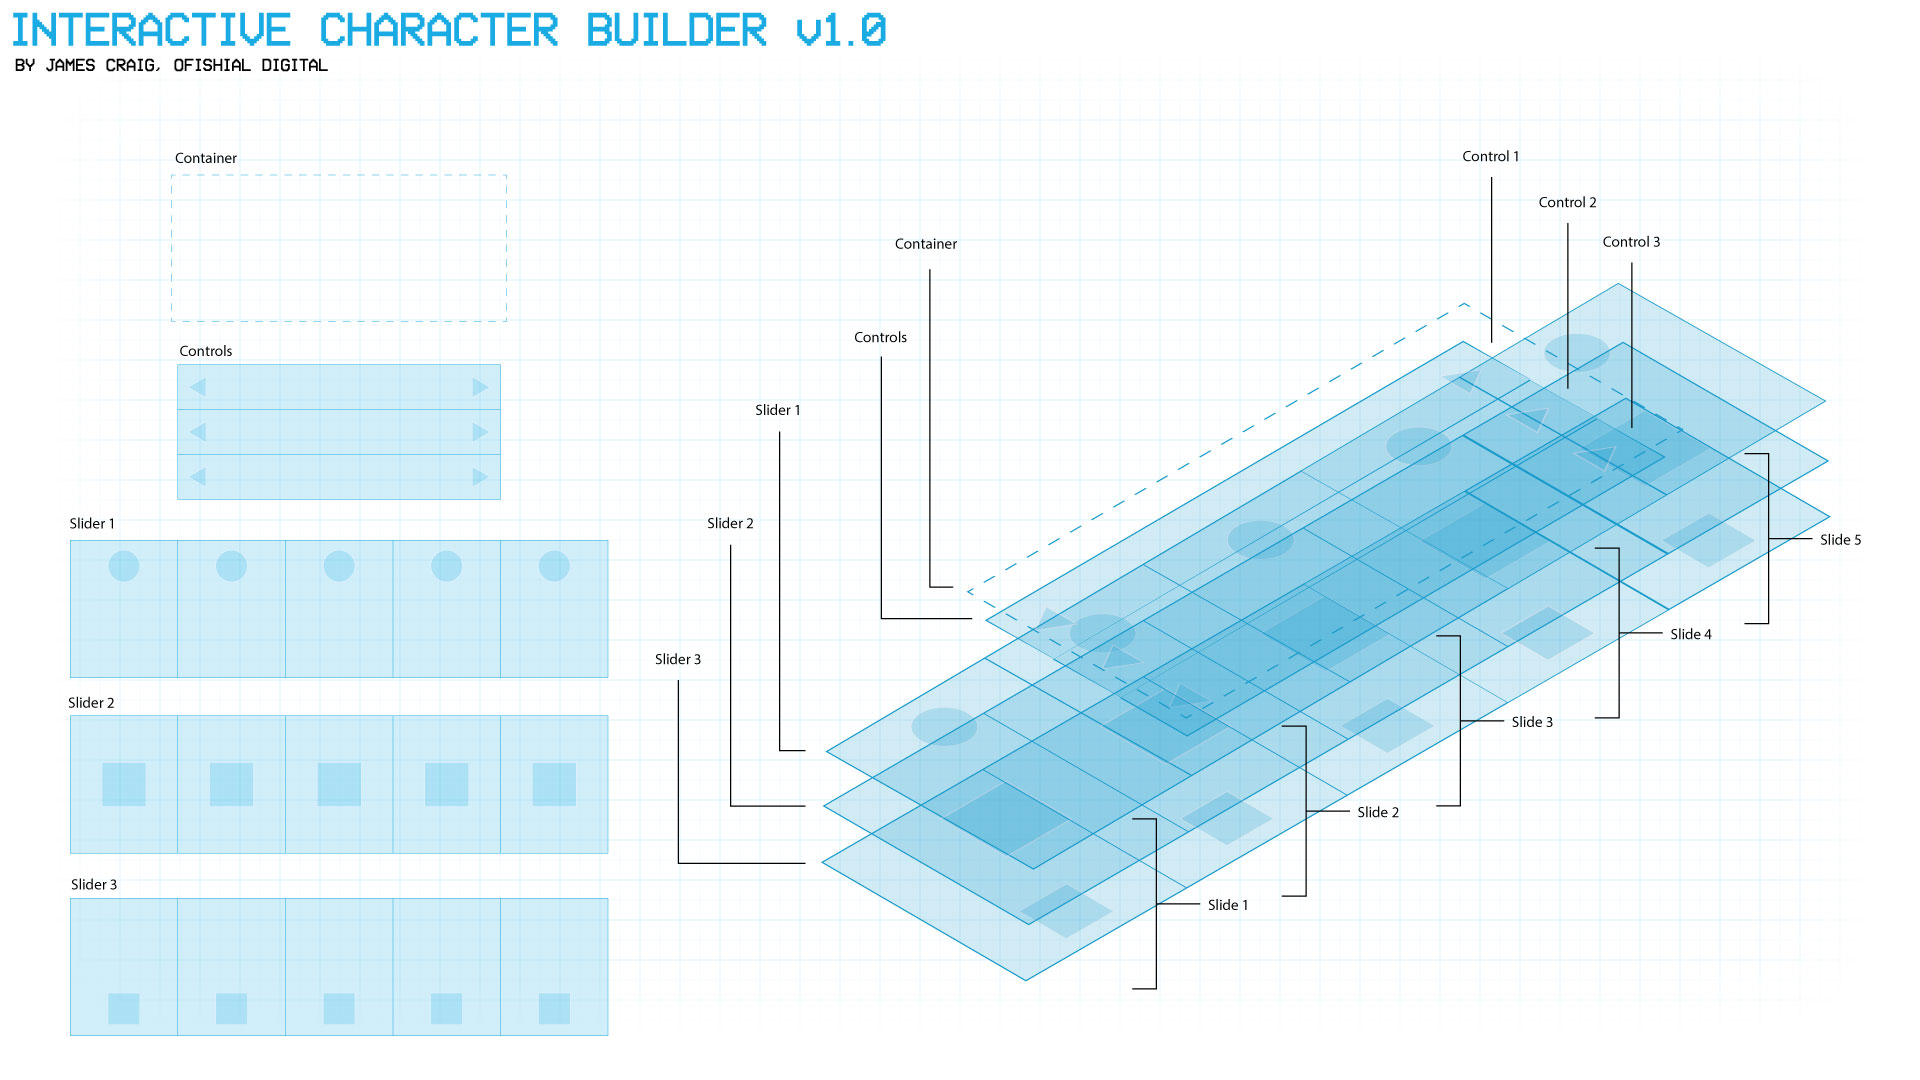
To build this interactive character builder I am going to be using a combination of sliders. Each slider will control a part of the characters' body, in this case, a head, a body, and legs section. Each slider will need its' own individual controls to allow building different configurations. In my example, there are 5 characters, with the window only showing 3. This allows us to re-position the characters outside of the view window without being seen. Creating an infinite scrolling slider! We'll be using absolute positioning and z-index to position all the separate layers correctly. The end result will look like the plan below:
Laying some foundations
As all the email development work I do is based on the principle of keeping things modular I won't go into the details on how to set up the basic structure of your email. If you'd like a basic email boilerplate you can download one here. We will, however, add a nice simple table to wrap everything we build up in a nice neet little module.
<table role="presentation" width="100%" cellpadding="0" cellspacing="0" border="0" align="center">
 <tr>
  <td align="center">
  <!-- Interactive Character Builder -->
  <!--[if !mso]><!-- -->
  <div id="h-mso-w" class="slider h-mso-m" style="display: none; visibility: hidden;">
   <!-- ALL YOUR INTERACTIVE CODE WILL GO HERE -->
  </div>
  <!--<![endif]-->
  <!-- Fallback Content START -->
  <div id="s-mso-w" class="fallback">
   <!-- ALL YOUR FALLBACK CODE WILL GO HERE -->
  </div>
  <!-- Fallback Content END -->
 </tr>
</table>
Let's break down quickly what we have above. We have a basic table with one cell acting as a wrapper. Inside this, we have two div's to place our content. One div (class="slider") for the interactive code. And one div (class="fallback") for the fallback code.
- The interactive div we wrap in some outlook conditional code to stop outlook showing the interactive elements entirely. The exclamation mark means NOT, so this reads as 'if not Microsoft Office'
- We added some inline CSS to hide the interactive div by default 'style="display: none; visibility: hidden'.
- We've added some other ID's and classes for 'mso'. We'll explain these fixes later on in the tutorial.